Posts

Showing posts from February, 2015

Blue Sea ST Blade Fuse Block

Image
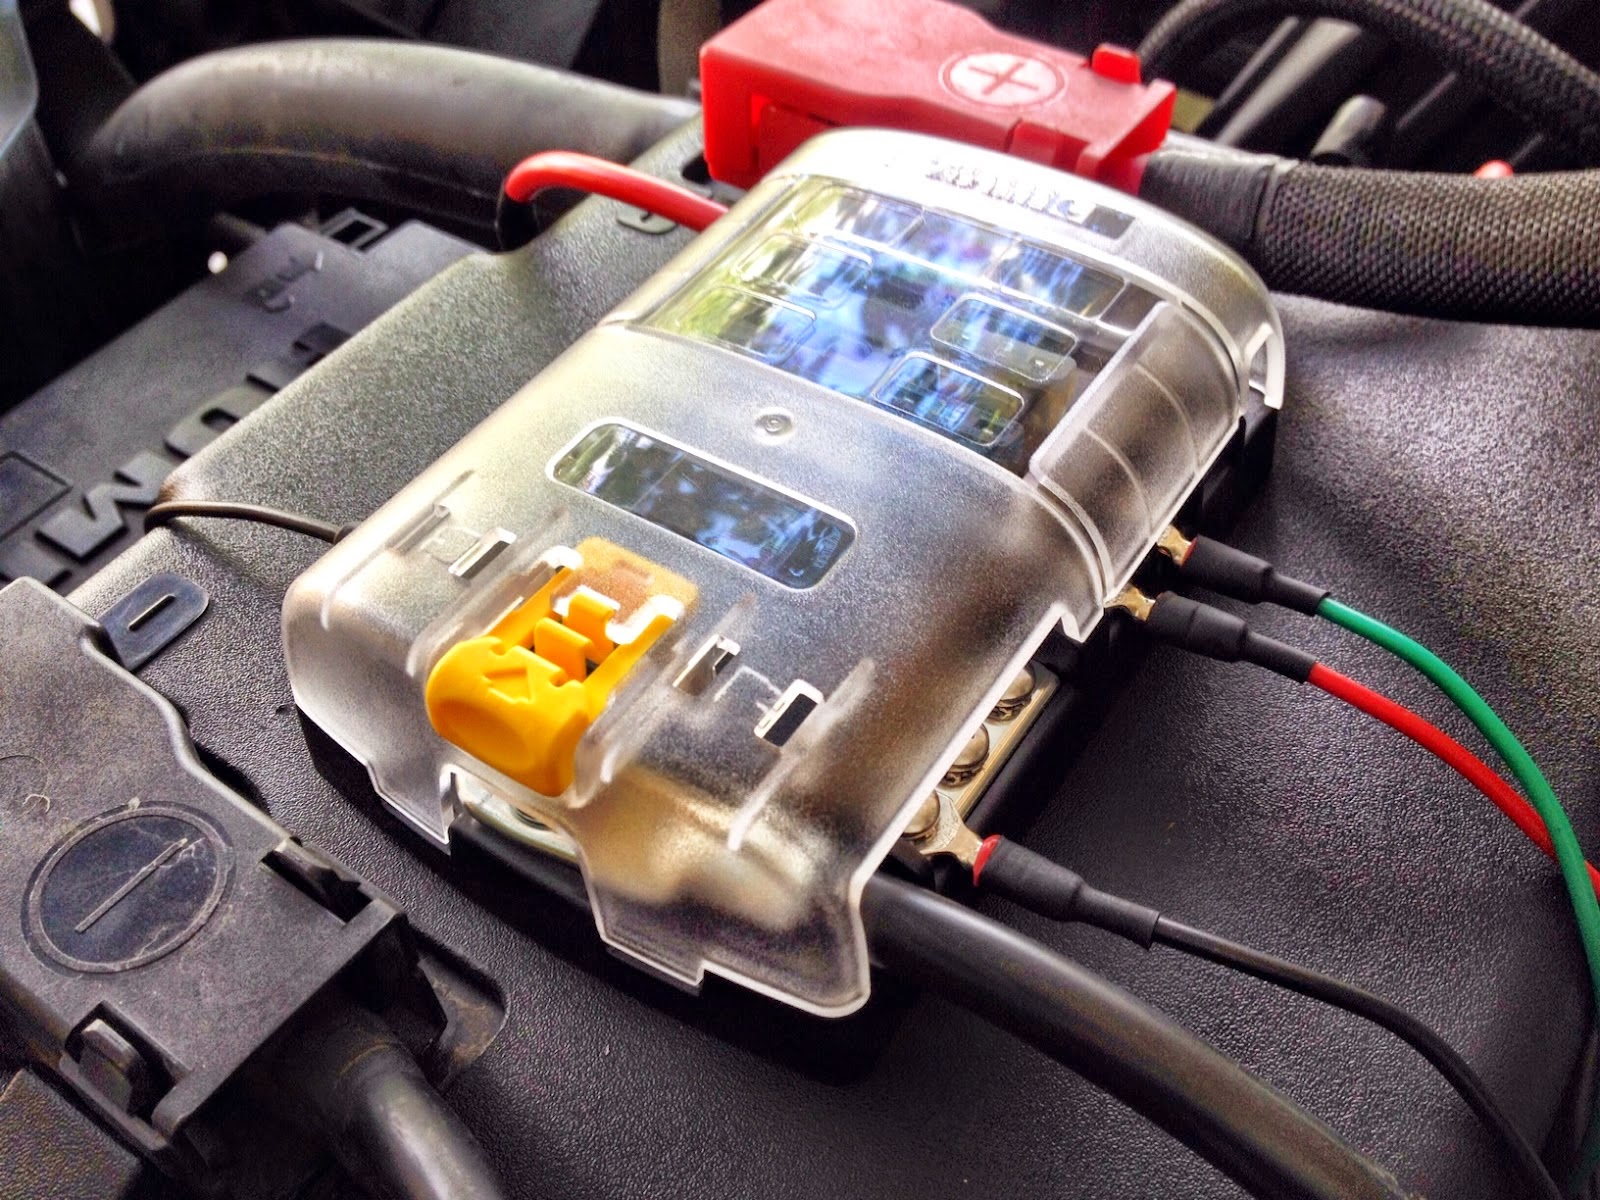
Blue Sea ST Blade Fuse Block The H3 got a Blue Sea fuse block added to provide six extra circuits for powered accessories such as the Hella 700ff lamps, a CB, and rear work lamps. Blue Sea Systems make a variety of marine and automotive application 12v fuse blocks. The ST Blade box comes in 6 and 12 circuits with or without a negative bus. I won't be adding many accessories so I opted for the six circuit ST Blade with the negative bus to make grounding something I won't have to troubleshoot. The ST Blade is mounted to the top of H3's battery box cover between the battery posts. It's powered from the positive post with a 6AWG wire that terminates to a Scorpion 100A breaker with a jump cable made from the same wire to the fuse block. The breaker was mounted in the recess next to the battery box vent to allow clearance for the fuse box cover below to be removed. A 6 AWG Duralast battery cable grounds the ST Blade to the H3's chassis. It's current conf

PCM of NC

Image
PCM Reprogram - July 19, 2014 Even though the H3's I5 produces a bit more power than the Montero's V6, it's sluggish at best with low RPM shifts with flat torque curves. I researched a number of mechanical mods to improve this (within my budget) and found that the most common - air intake upgrades, headers - yielded little change in performance and better fuel efficiency.  From various H3 user forums I heard about  PCM of North Carolina  and researched their service; they flash and reprogram the factory PCM (power-train control module) promising better throttle response and fuel efficiency, better shift points making better use of the torque curve, and more horsepower.  Sounds too good to be true, but having lived in North Carolina, it's been my experience to have never been disappointed with anything that comes from that state. So I made the order. I opted for their loaner program where they send a unit to replace the factory PCM while it's sent

H3 Versus Gen III Montero

Image
The H3 has a solid axle rear end on leaf springs with an independent SLA torsion bar system up front where the Montero has independent suspension on all four corners. I crossed up the H3 on a ravine where I've done the same with the Montero, both in stock form. The extended suspension members of the H3 kept their wheels out of contact with the surface where the Montero kept all four planted. Habit being what it is, I keep trying to flick the auto stick in the H3 to the tiptronic mode of the Montero, something I'll miss the most from Mitsubishi especially on the hills. Downshifting the H3's automatic is standard GM fare, clunky due to its locking and release to go from drive to third gear, and then selecting drive again runs the risk on an inadvertent free-wheeling neutral. There is a five speed manual for the H3, much preferred for off-road, but I opted for the automatic for better towing. Compromise. The Montero didn't have to.    Ergonomically, these two are f

Recovery

Image
TREDs, Hi-Lift Jack and Shovel Mount Switching to the H3 from a Gen III Montero has been a considerable exercise in scaling down as far as storage goes. The H3 has 25 cubic feet where the Montero had over 43 cubic feet that included an under-floor cubby that was ideal for recovery gear. I added a Garvin Sport roof rack to provide a place to mount a Hi-Lift jack and a shovel along with a pair of traction devices and a low profile weather-proof box to stow straps, a Lift-Mate and other recovery gear. The jack and shovel have been mounted using Quick Fist clamps. The jack mount uses the same concept found on the Montero with a 3/8 bolt that protrudes through the steel bar and a stainless steel wing nut to secure it.  I've since mounted a Plano 42" weather-proof locking tactical case that holds a Lift-Mate, a snatch strap, tools and other recovery items.  The case is bolted to the rack. I've really come to appreciate the Garvin rack's ability to adap

Tires and Grill Blackout

Image
The first two modifications on the H3 were to upgrade tires and remove chrome.  I replaced the 265/75/R16s that came with the purchase with 285/75R16s. I went with Hankook DynaPro ATM RF10s to take care of both on and off road duties. I also blacked out the chrome grille - too much shiny for my tastes in an adventure vehicle. Updating to Cooper Discoverer MTP 315/75R16s

Gallery

Image