Rear Door Mod
While the above modification worked well to keep essentials handy, it encroached too far into the cargo space, since the overland gear packs in filling the space completely while securing the load.
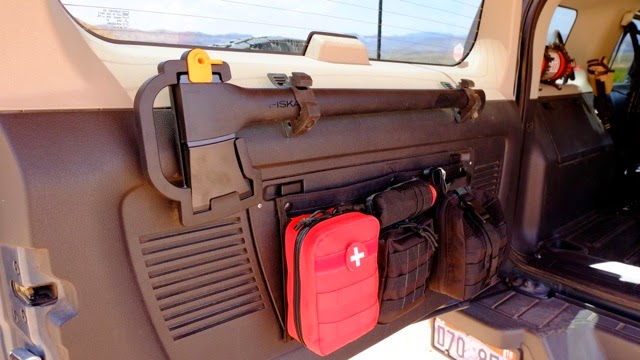
The Fiskars ax has been relocated across the driver-side cargo area storage compartment and the MOLLE panel has been moved up above the rear-door utility shelf.


Rear Door Utility Shelf Mod


Looking at clearances and how the panel is engineered to fit into the plastic surround I decided to use one-quarter inch oak veneer for the shelf and thought to hinge the panel to the surround.

I used a band saw to rough cut the outline of the oak shelf insert going back and forth to the door to test fit, rasp and sand until I was satisfied with the fit and clearance.

Once I had it fitted I stained it with MinWax Cherry stain, three coats, and after proper drying time shot it with Cabot's marine grade gloss spar varnish, five coats. It's far from perfect in finish and craft but it will do the job.

Next, I hung the panel to the surround using stainless steel marine hinges, the best alternative I could find that weathered well, looked better than hardware store fare, and adapted to the flare of the plastic surround. I used stainless 1/2 inch 10-24 hardware with locknuts. I then mounted the oak insert into the opening where it rest and closed the plastic panel over it and locked it down. I used some foam between the oak panel and the jack hardware to give the panel some resistance.
I drilled some pilot holes through the plastic panel for the top two fasteners, and then once it was installed drilled through those holes into the oak panel for alignment. I used stainless flathead one-inch 10-24 hardware with finishing washers on the oak side, with lock washers and thin nuts on the panel side finishing that with black plastic covers. With the two top fasteners installed, I measured, drilled and completed the bottom fasteners.


The top is tied to the riveted d-ring just below the opening using a cow hitch that is tied off down the cord allowing an easily adjustable suspension of the shelf.

This modification has since been upgraded with a MOLLE panel attached to the hatch with three different pouches.